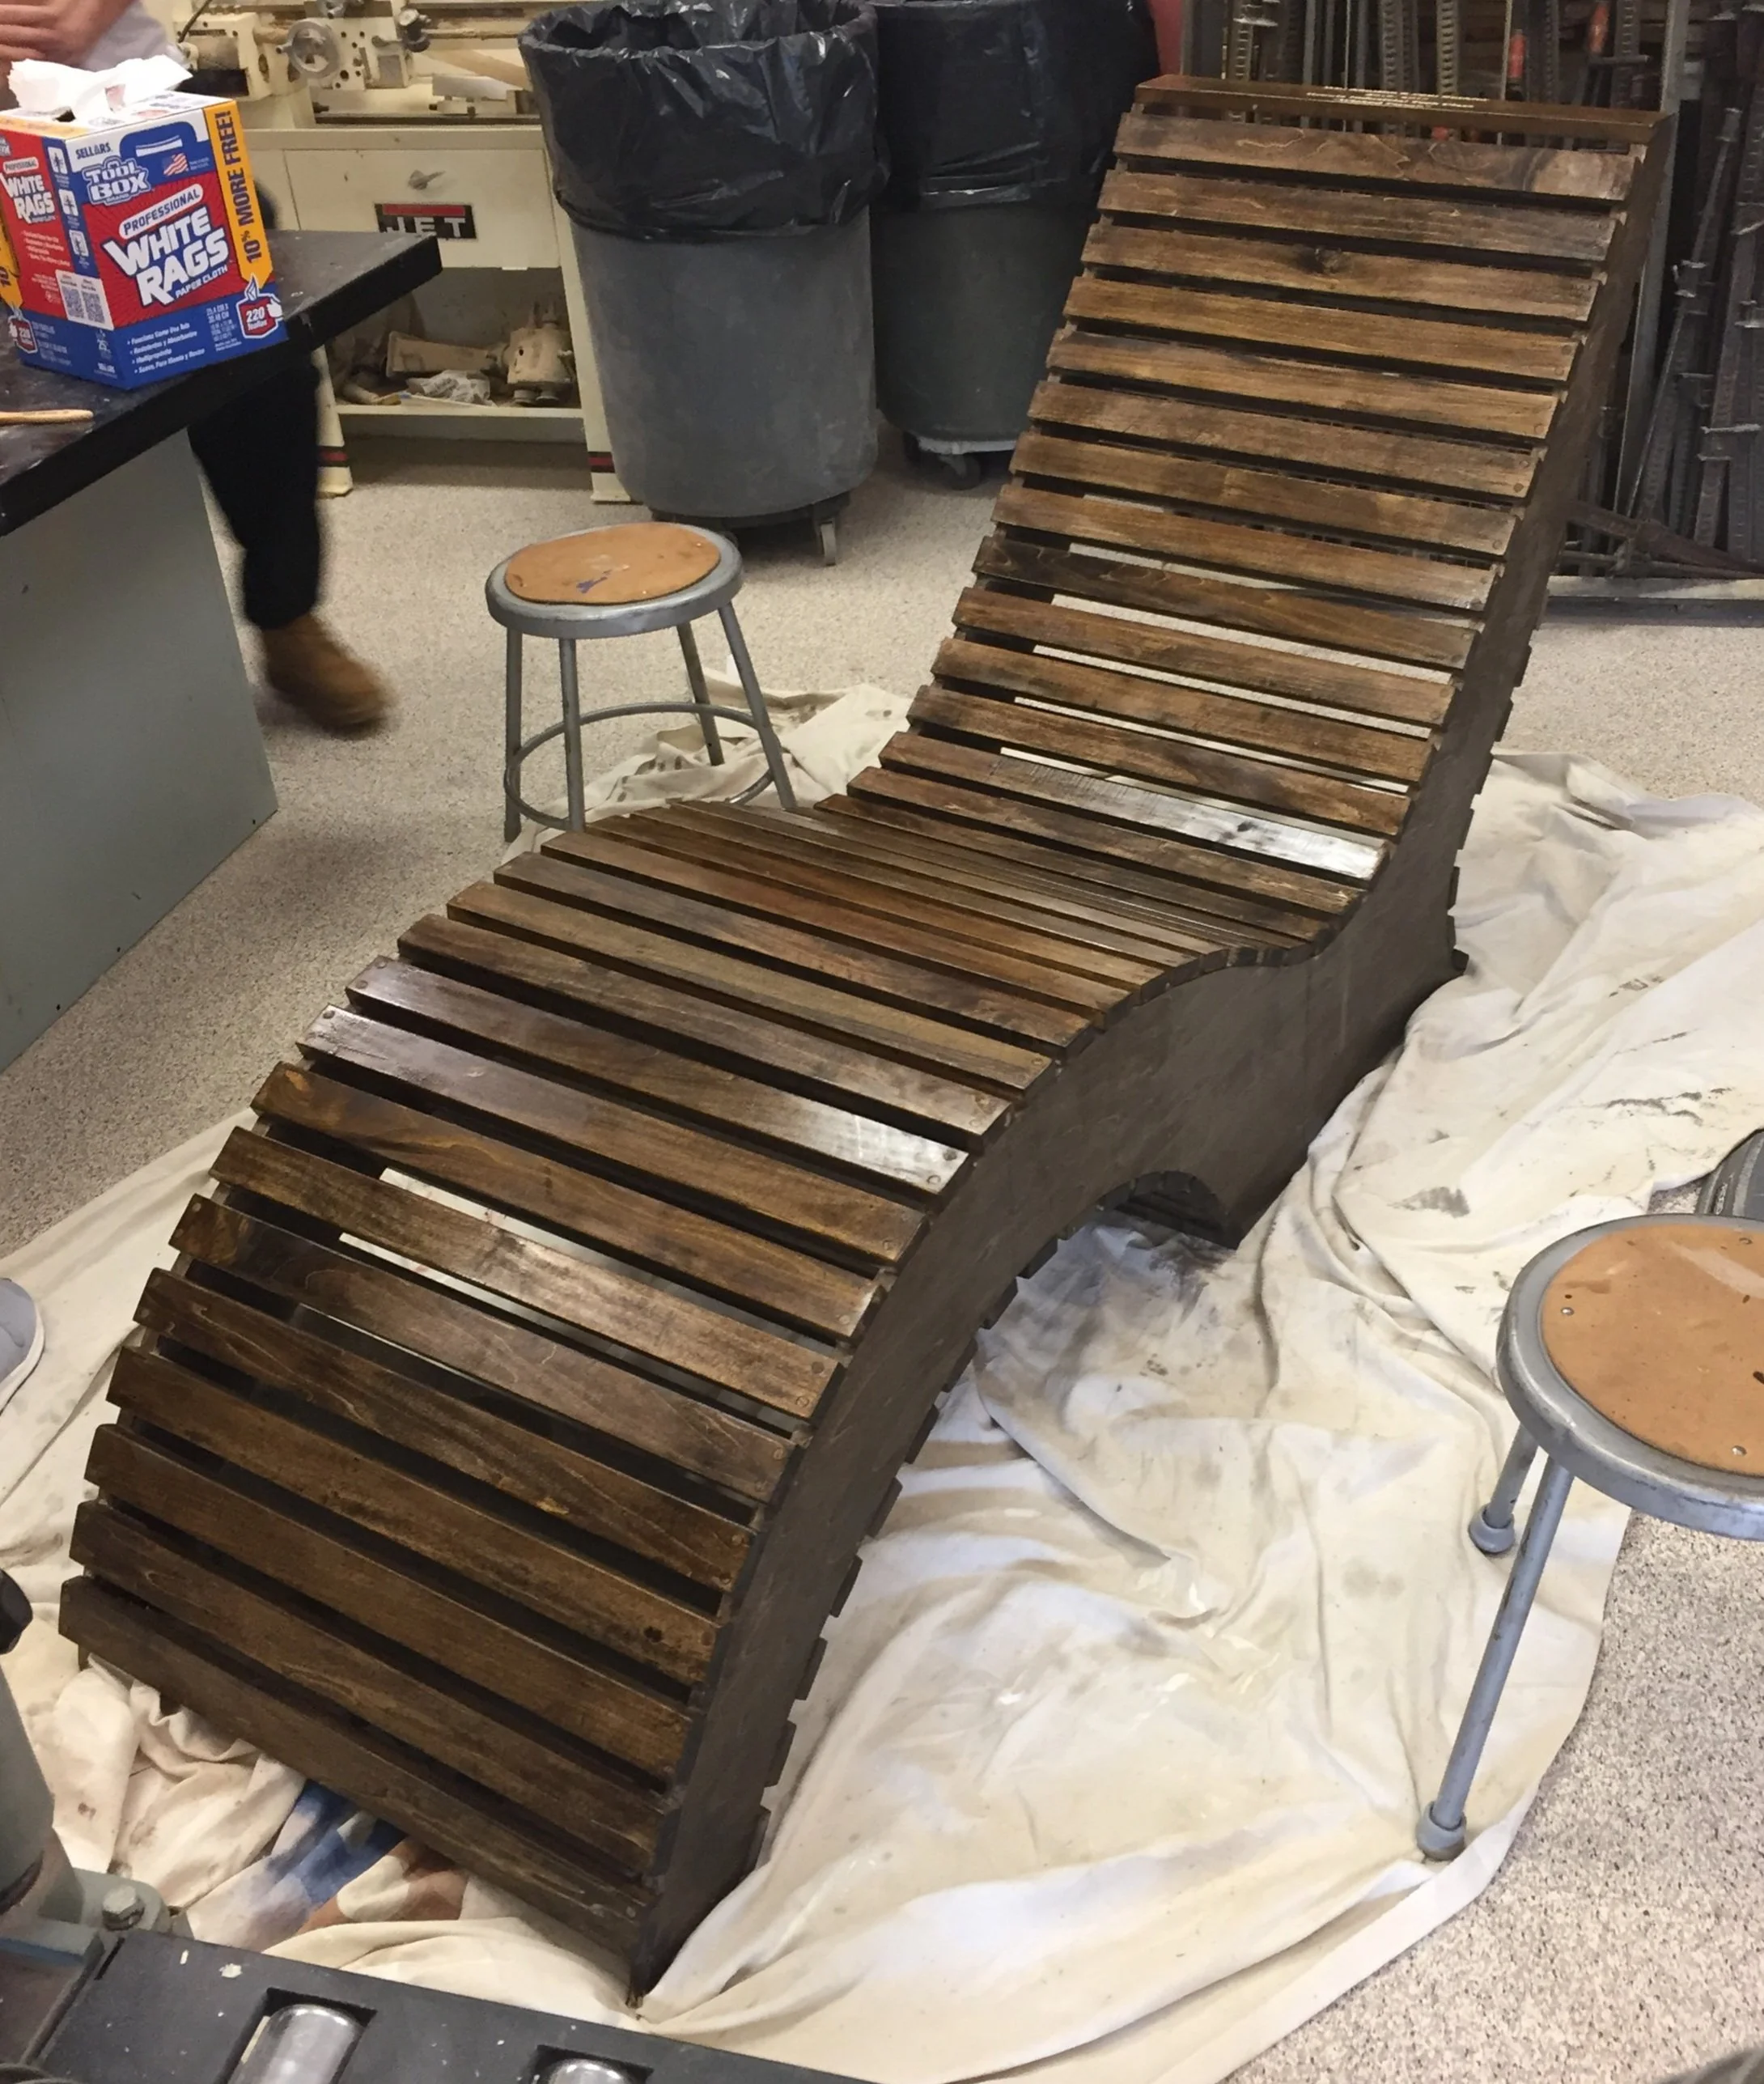
The Lounge Chair
My friend Paul Buckley and I decided to make this chair together as our industrial technology final project in high school. We made two of these chairs each kept one of them. We both still have our chairs and use them to this day. We put an engraving on the top of the chair to commemorate the semester and the good times we had. The chair is about 6.5 feet long, 2.5 feet wide, and 3.5 feet tall.

The Dedication/Engraving
This is the dedication Paul and I put on the top of the chair. Mr. Grout was our teacher whom we were close with (even though we forgot the apostrophe on his name in the engraving). “Wicked Pissah” was a phrase we found funny that was often said in our class and we thought it would only be right to include it as part of the chair. This engraving was done with a laser cutter and the inside was filled with stain-resistant white paint.
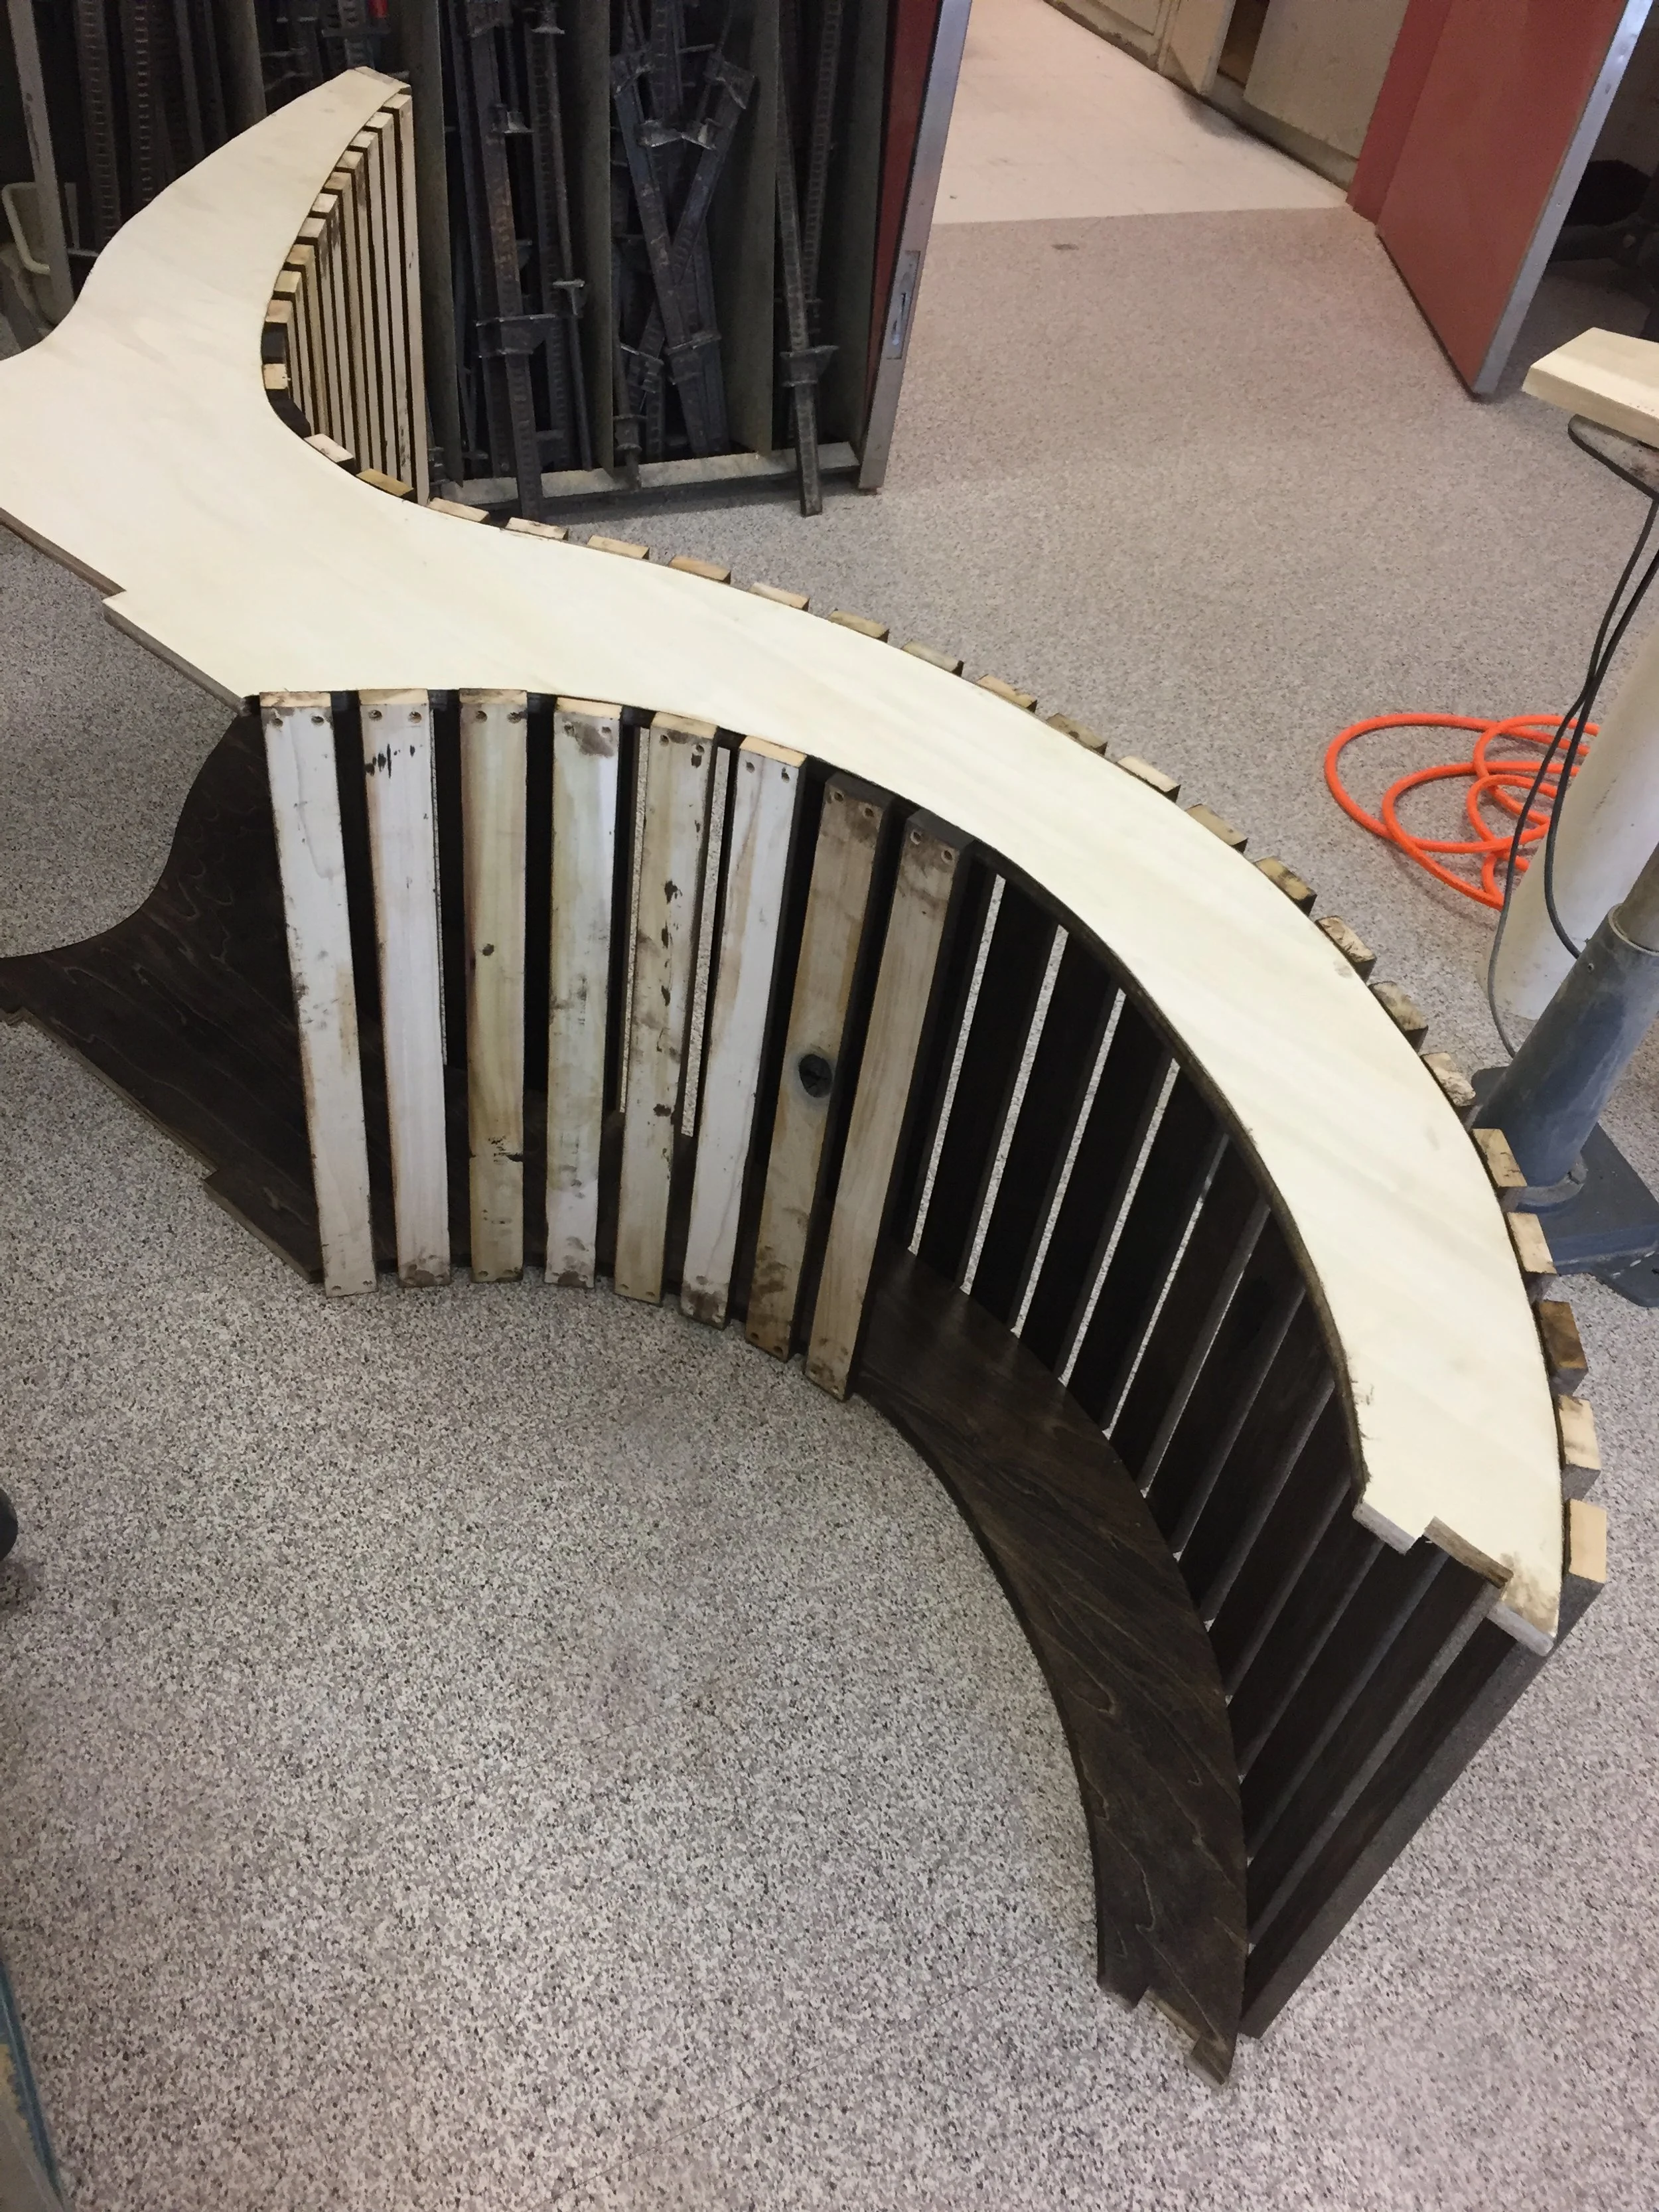
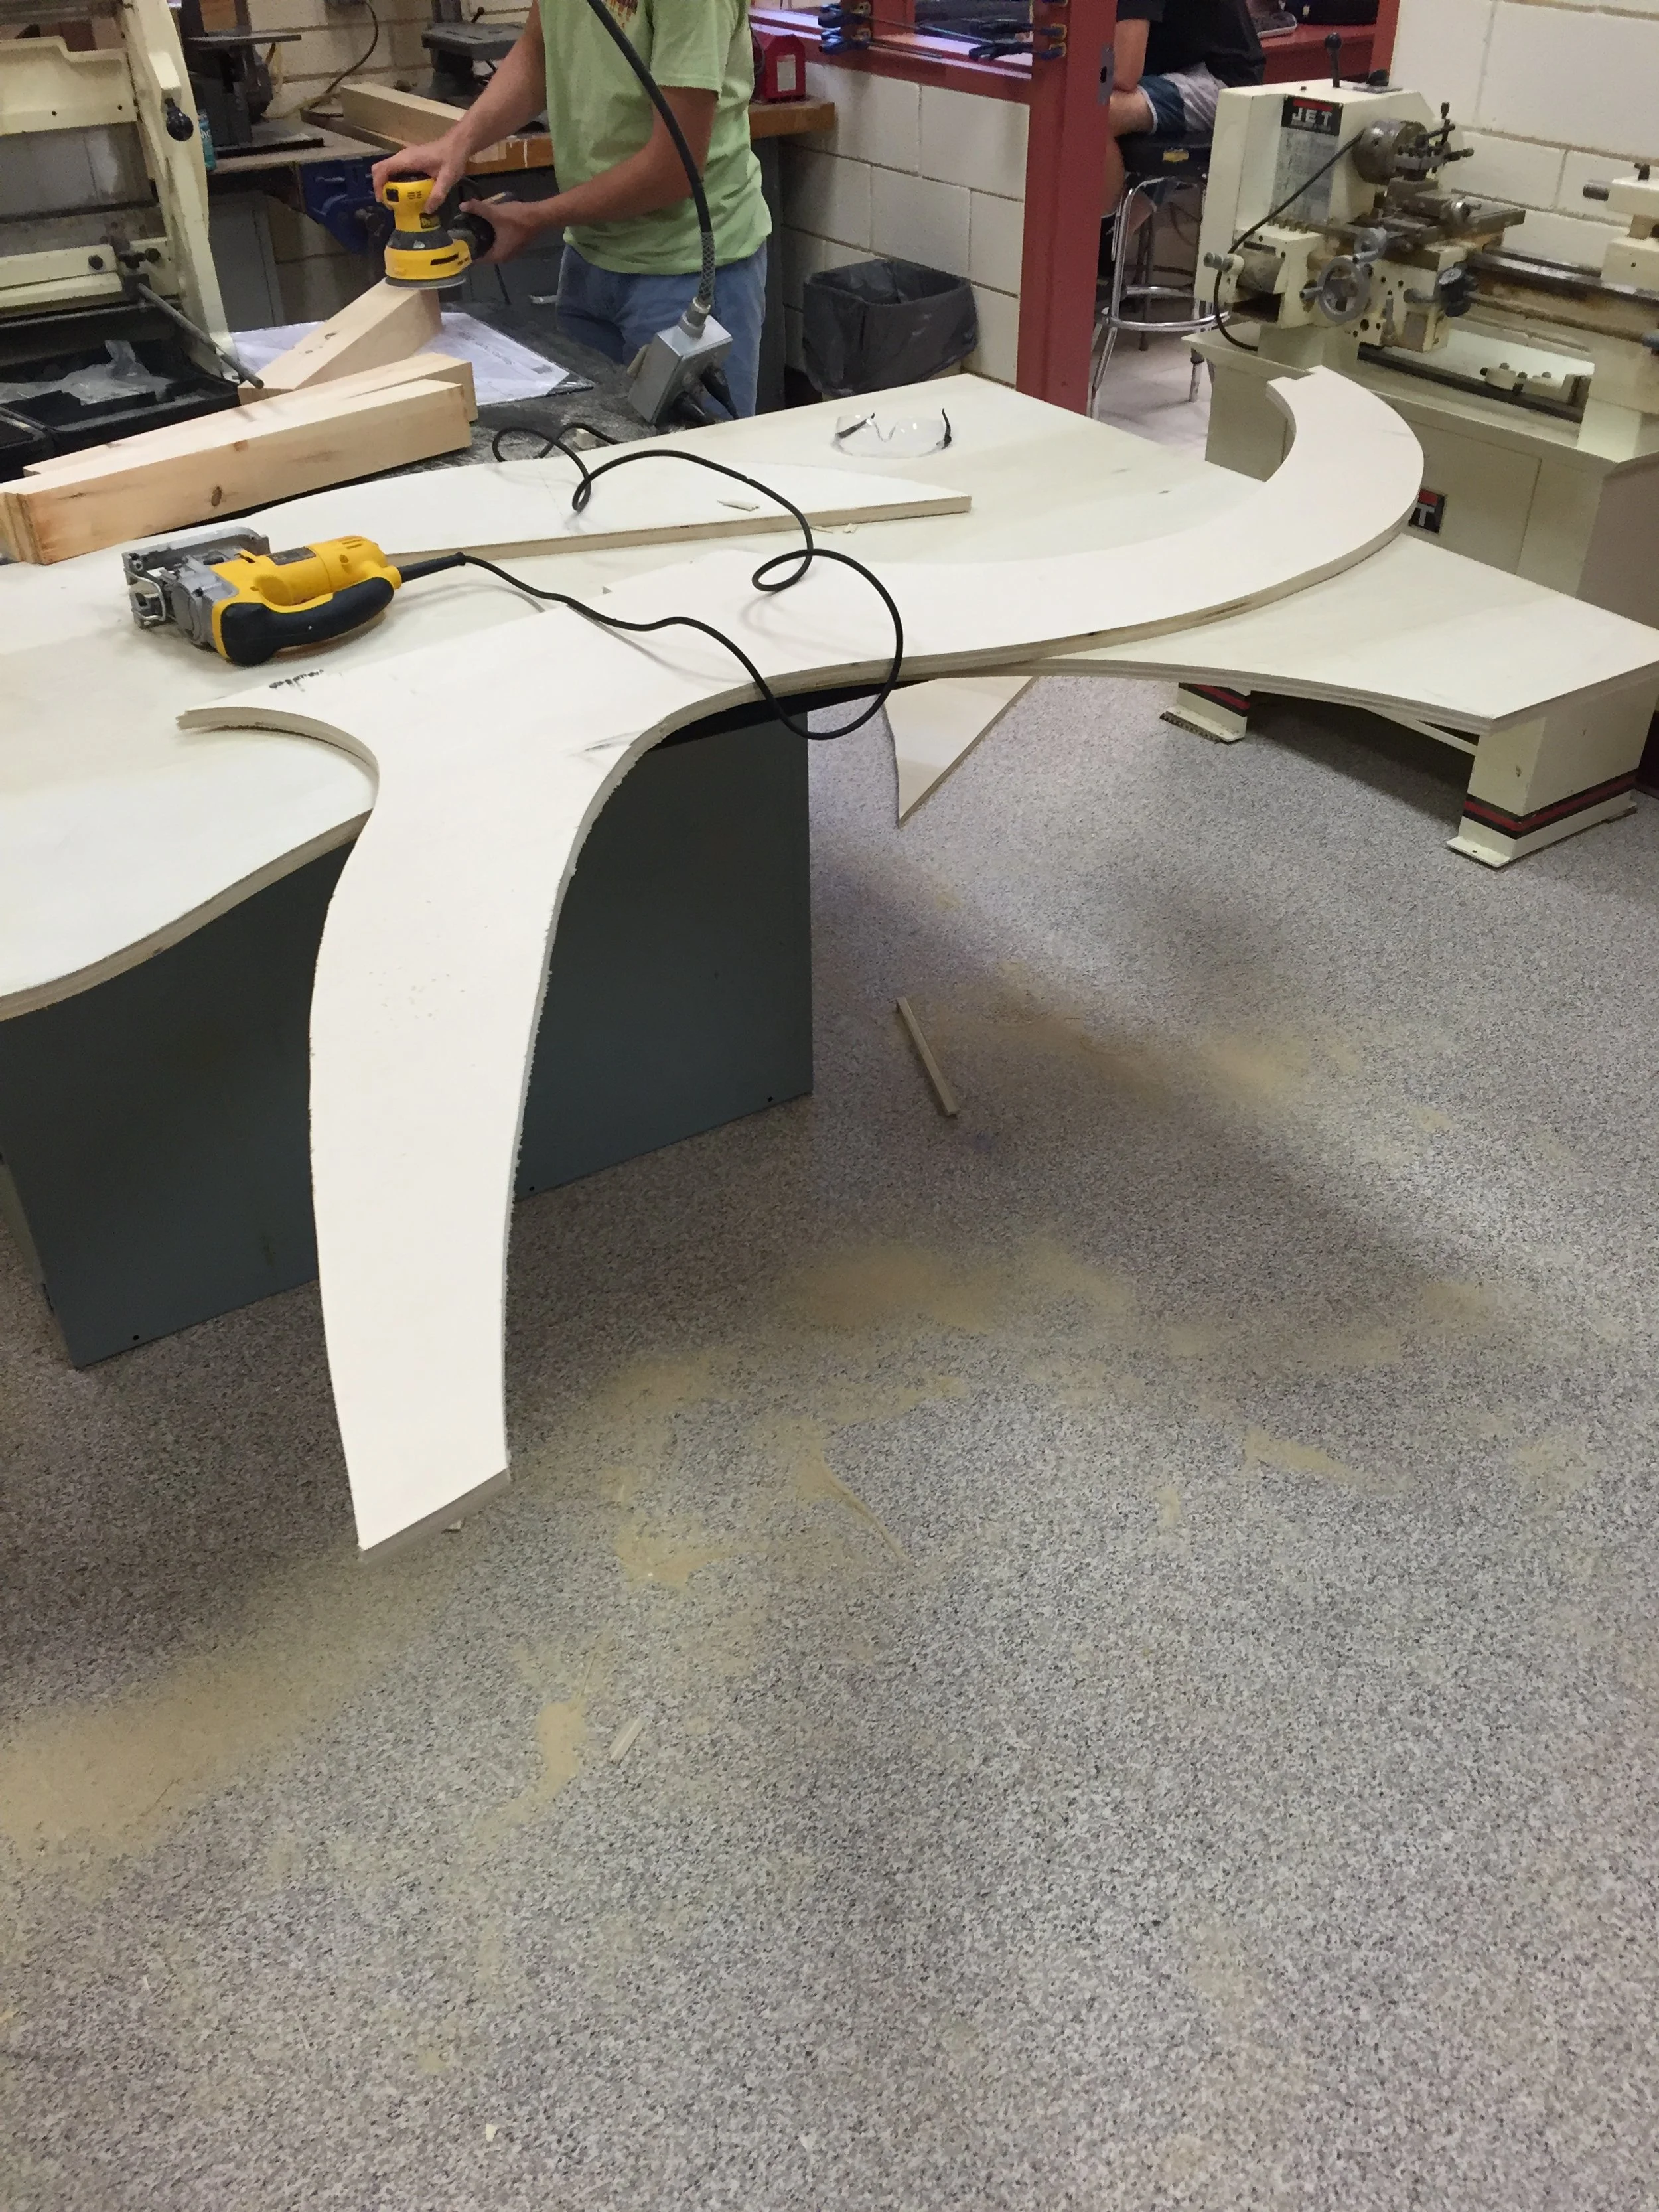
The Sides of the Chair
The first step in making this chair was making the two side pieces. This was done by very carefully drawing out the shapes on large sheets of plywood then carefully cutting out the shapes with a jig saw and skill saw. This was followed by sanding the two side pieces to make sure they were exactly the same size and shape.

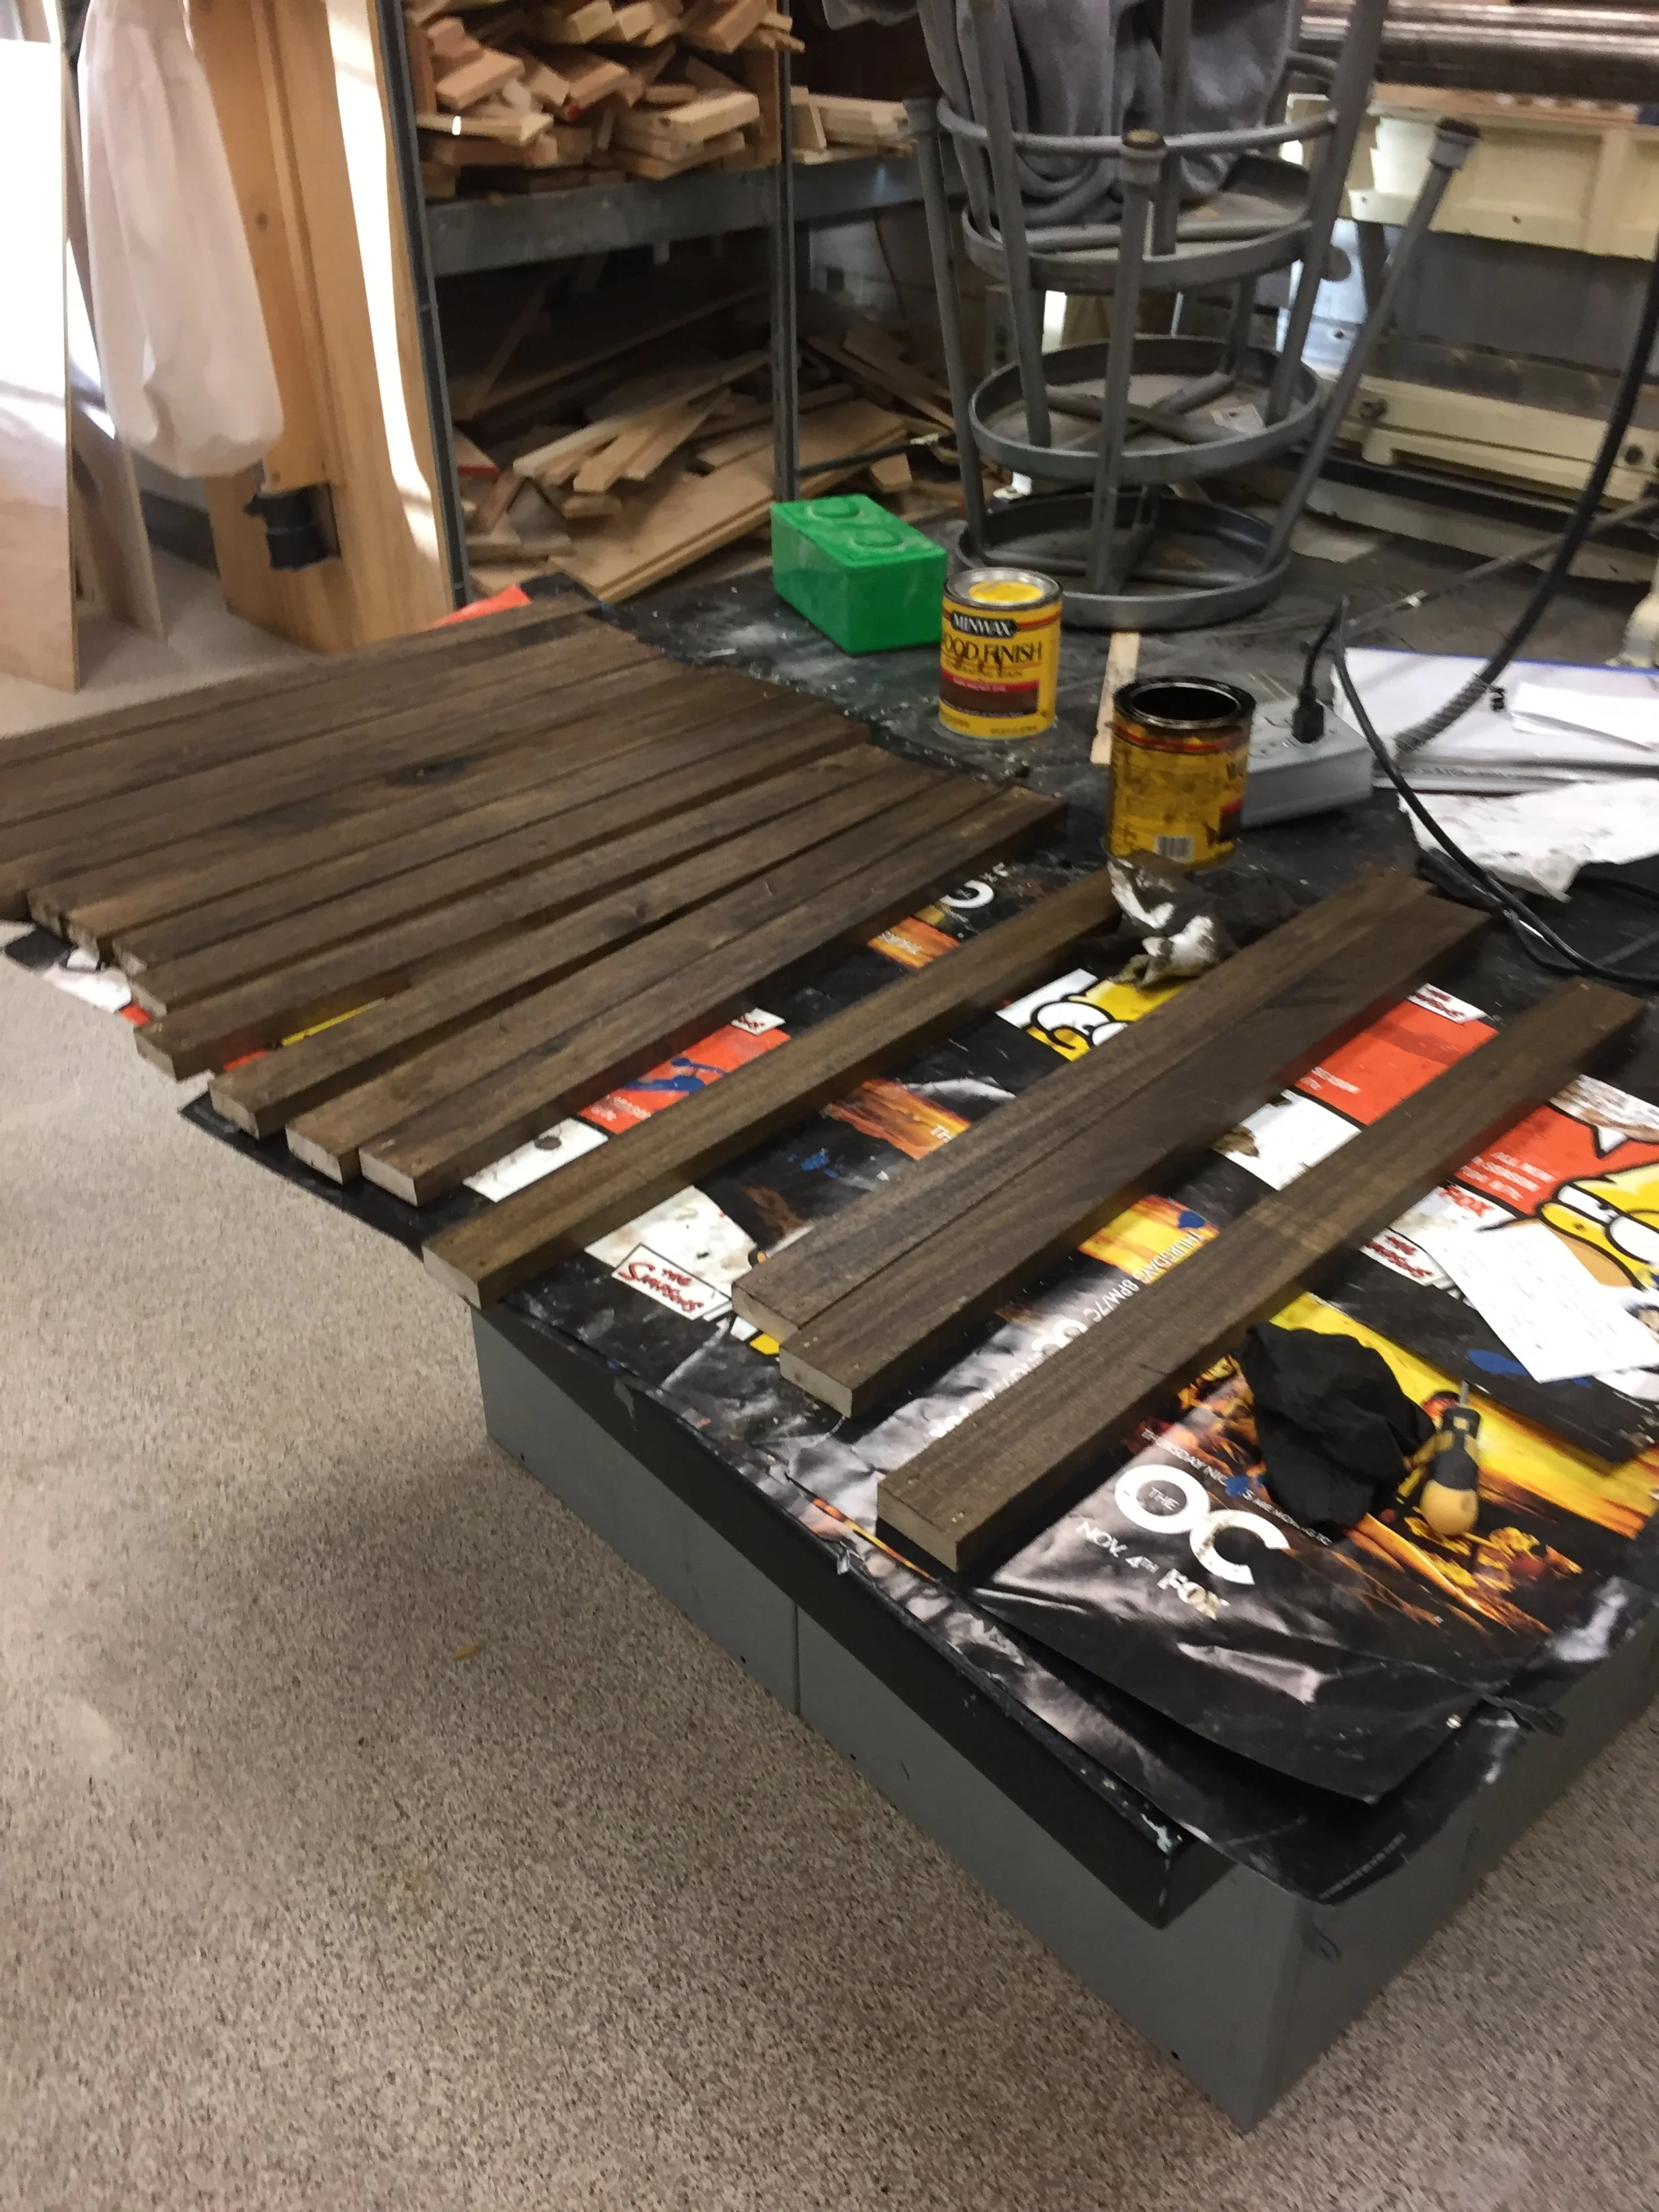
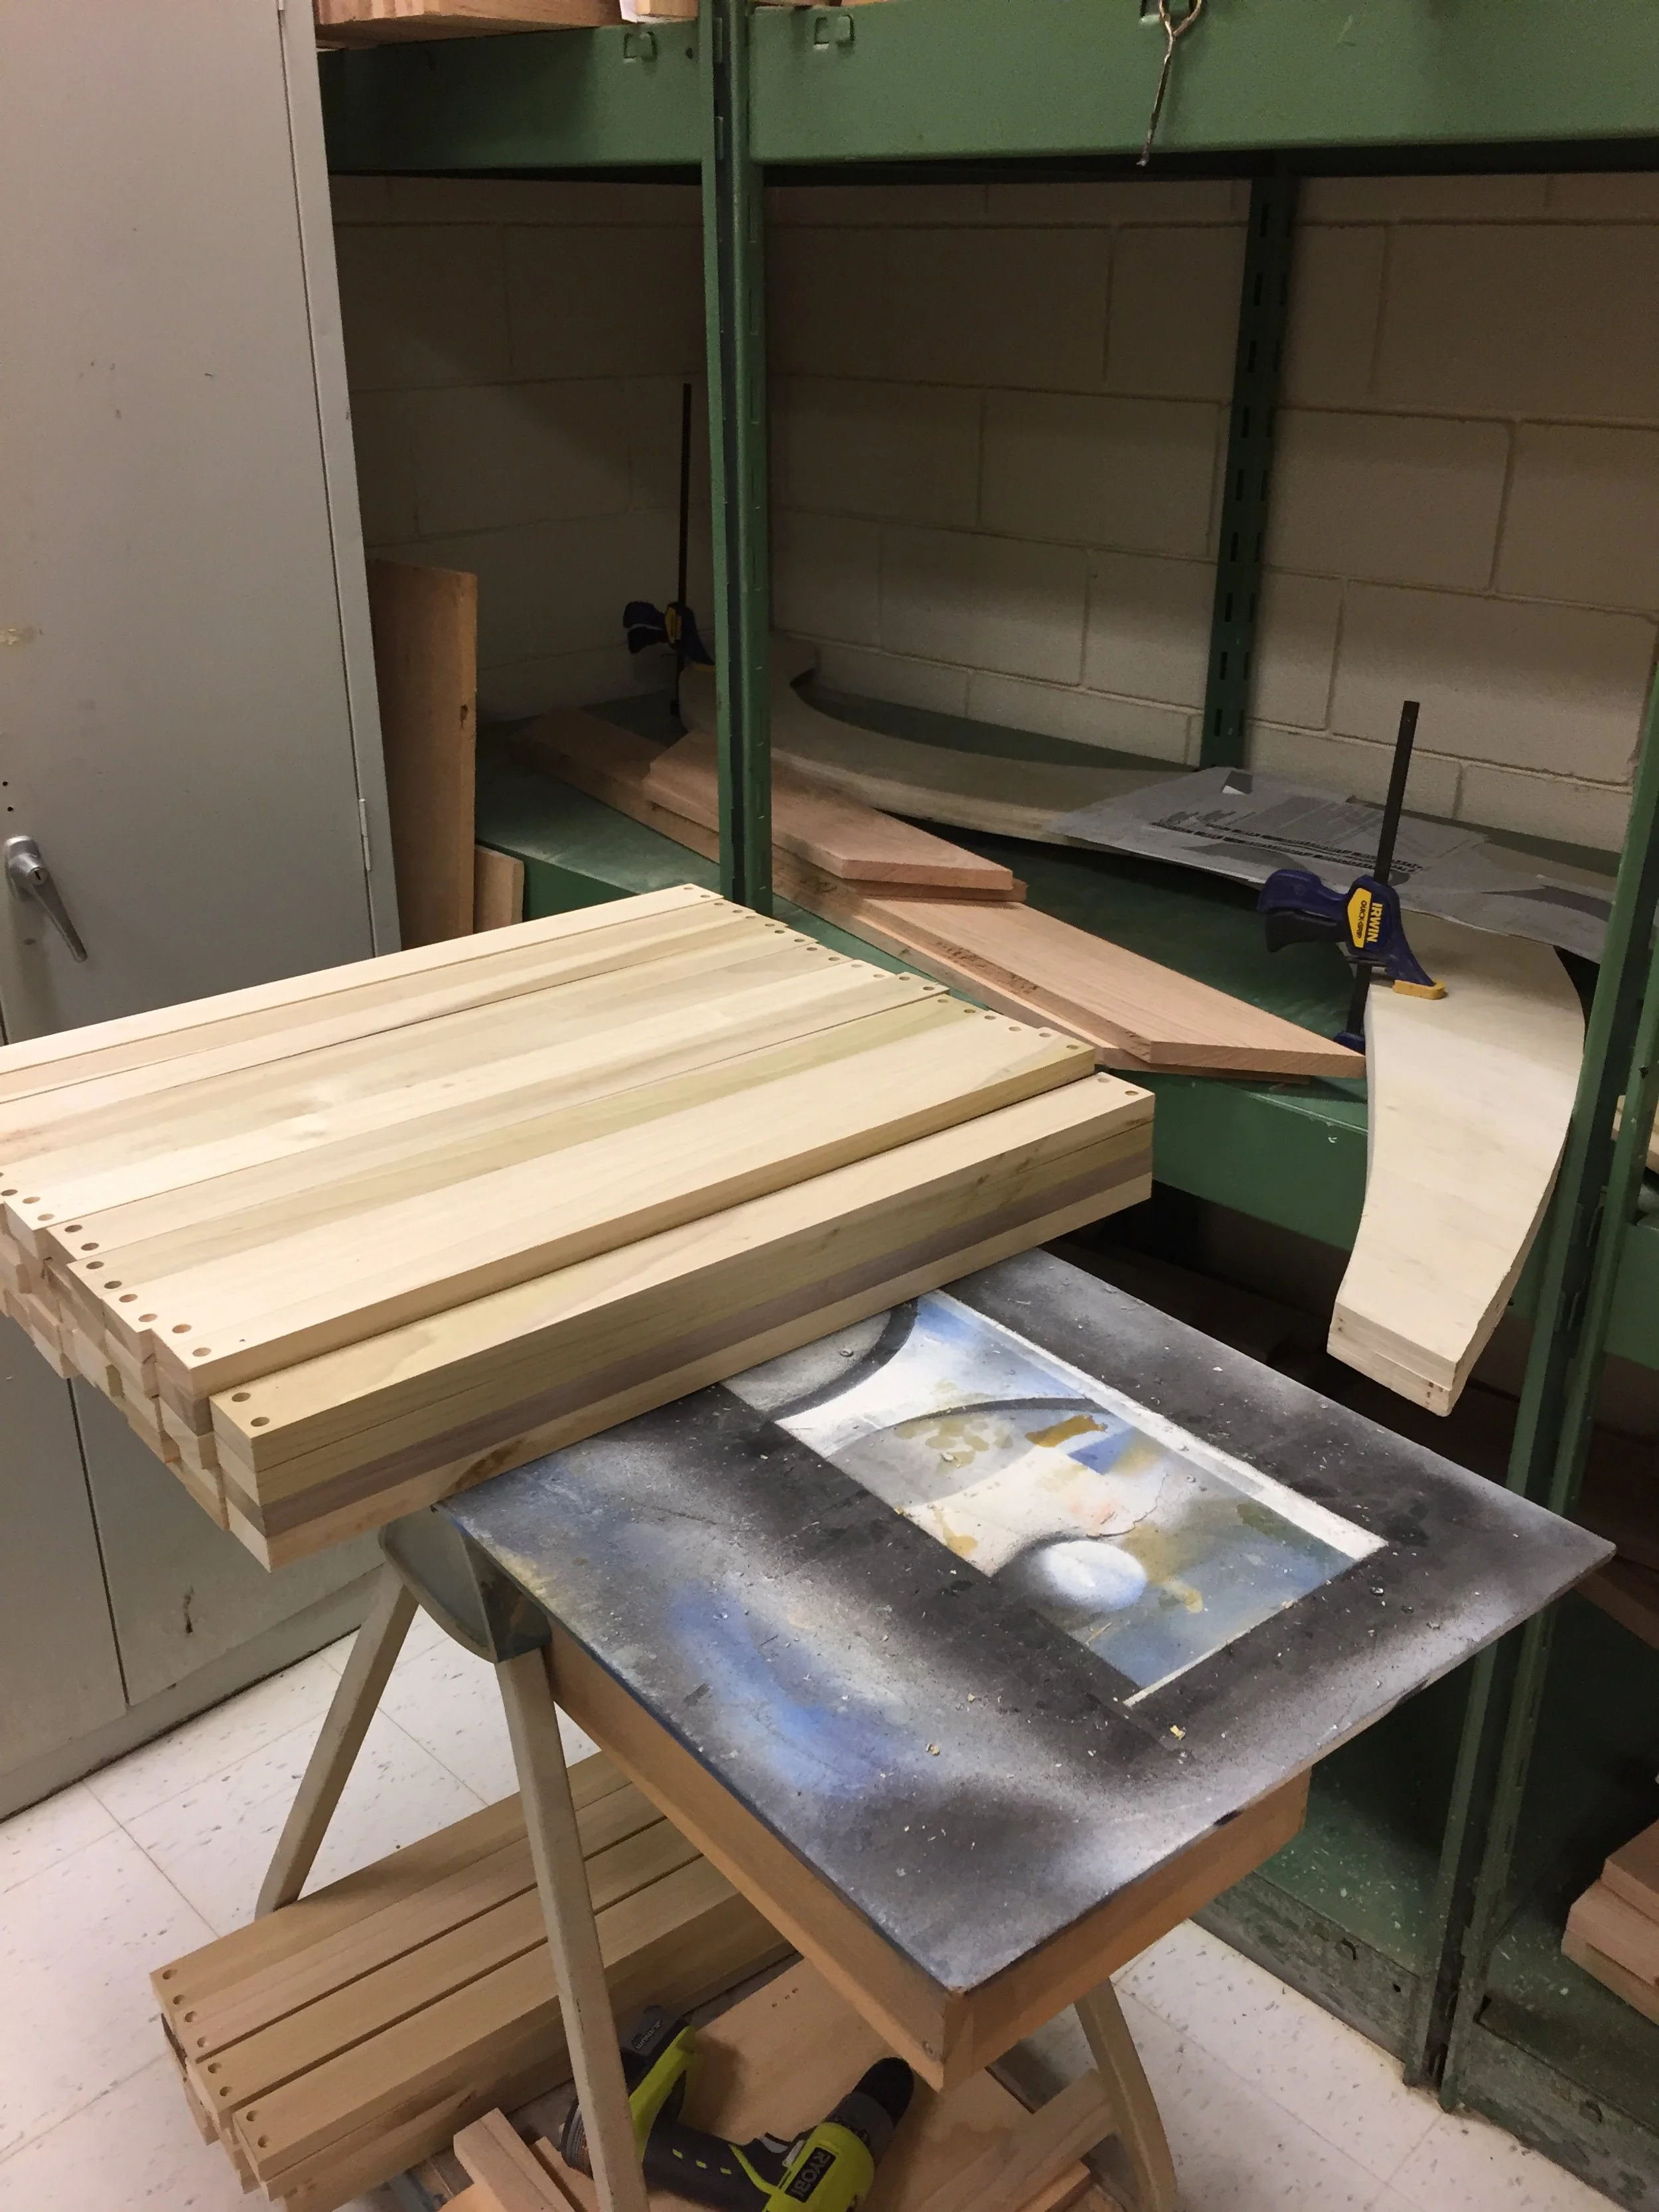
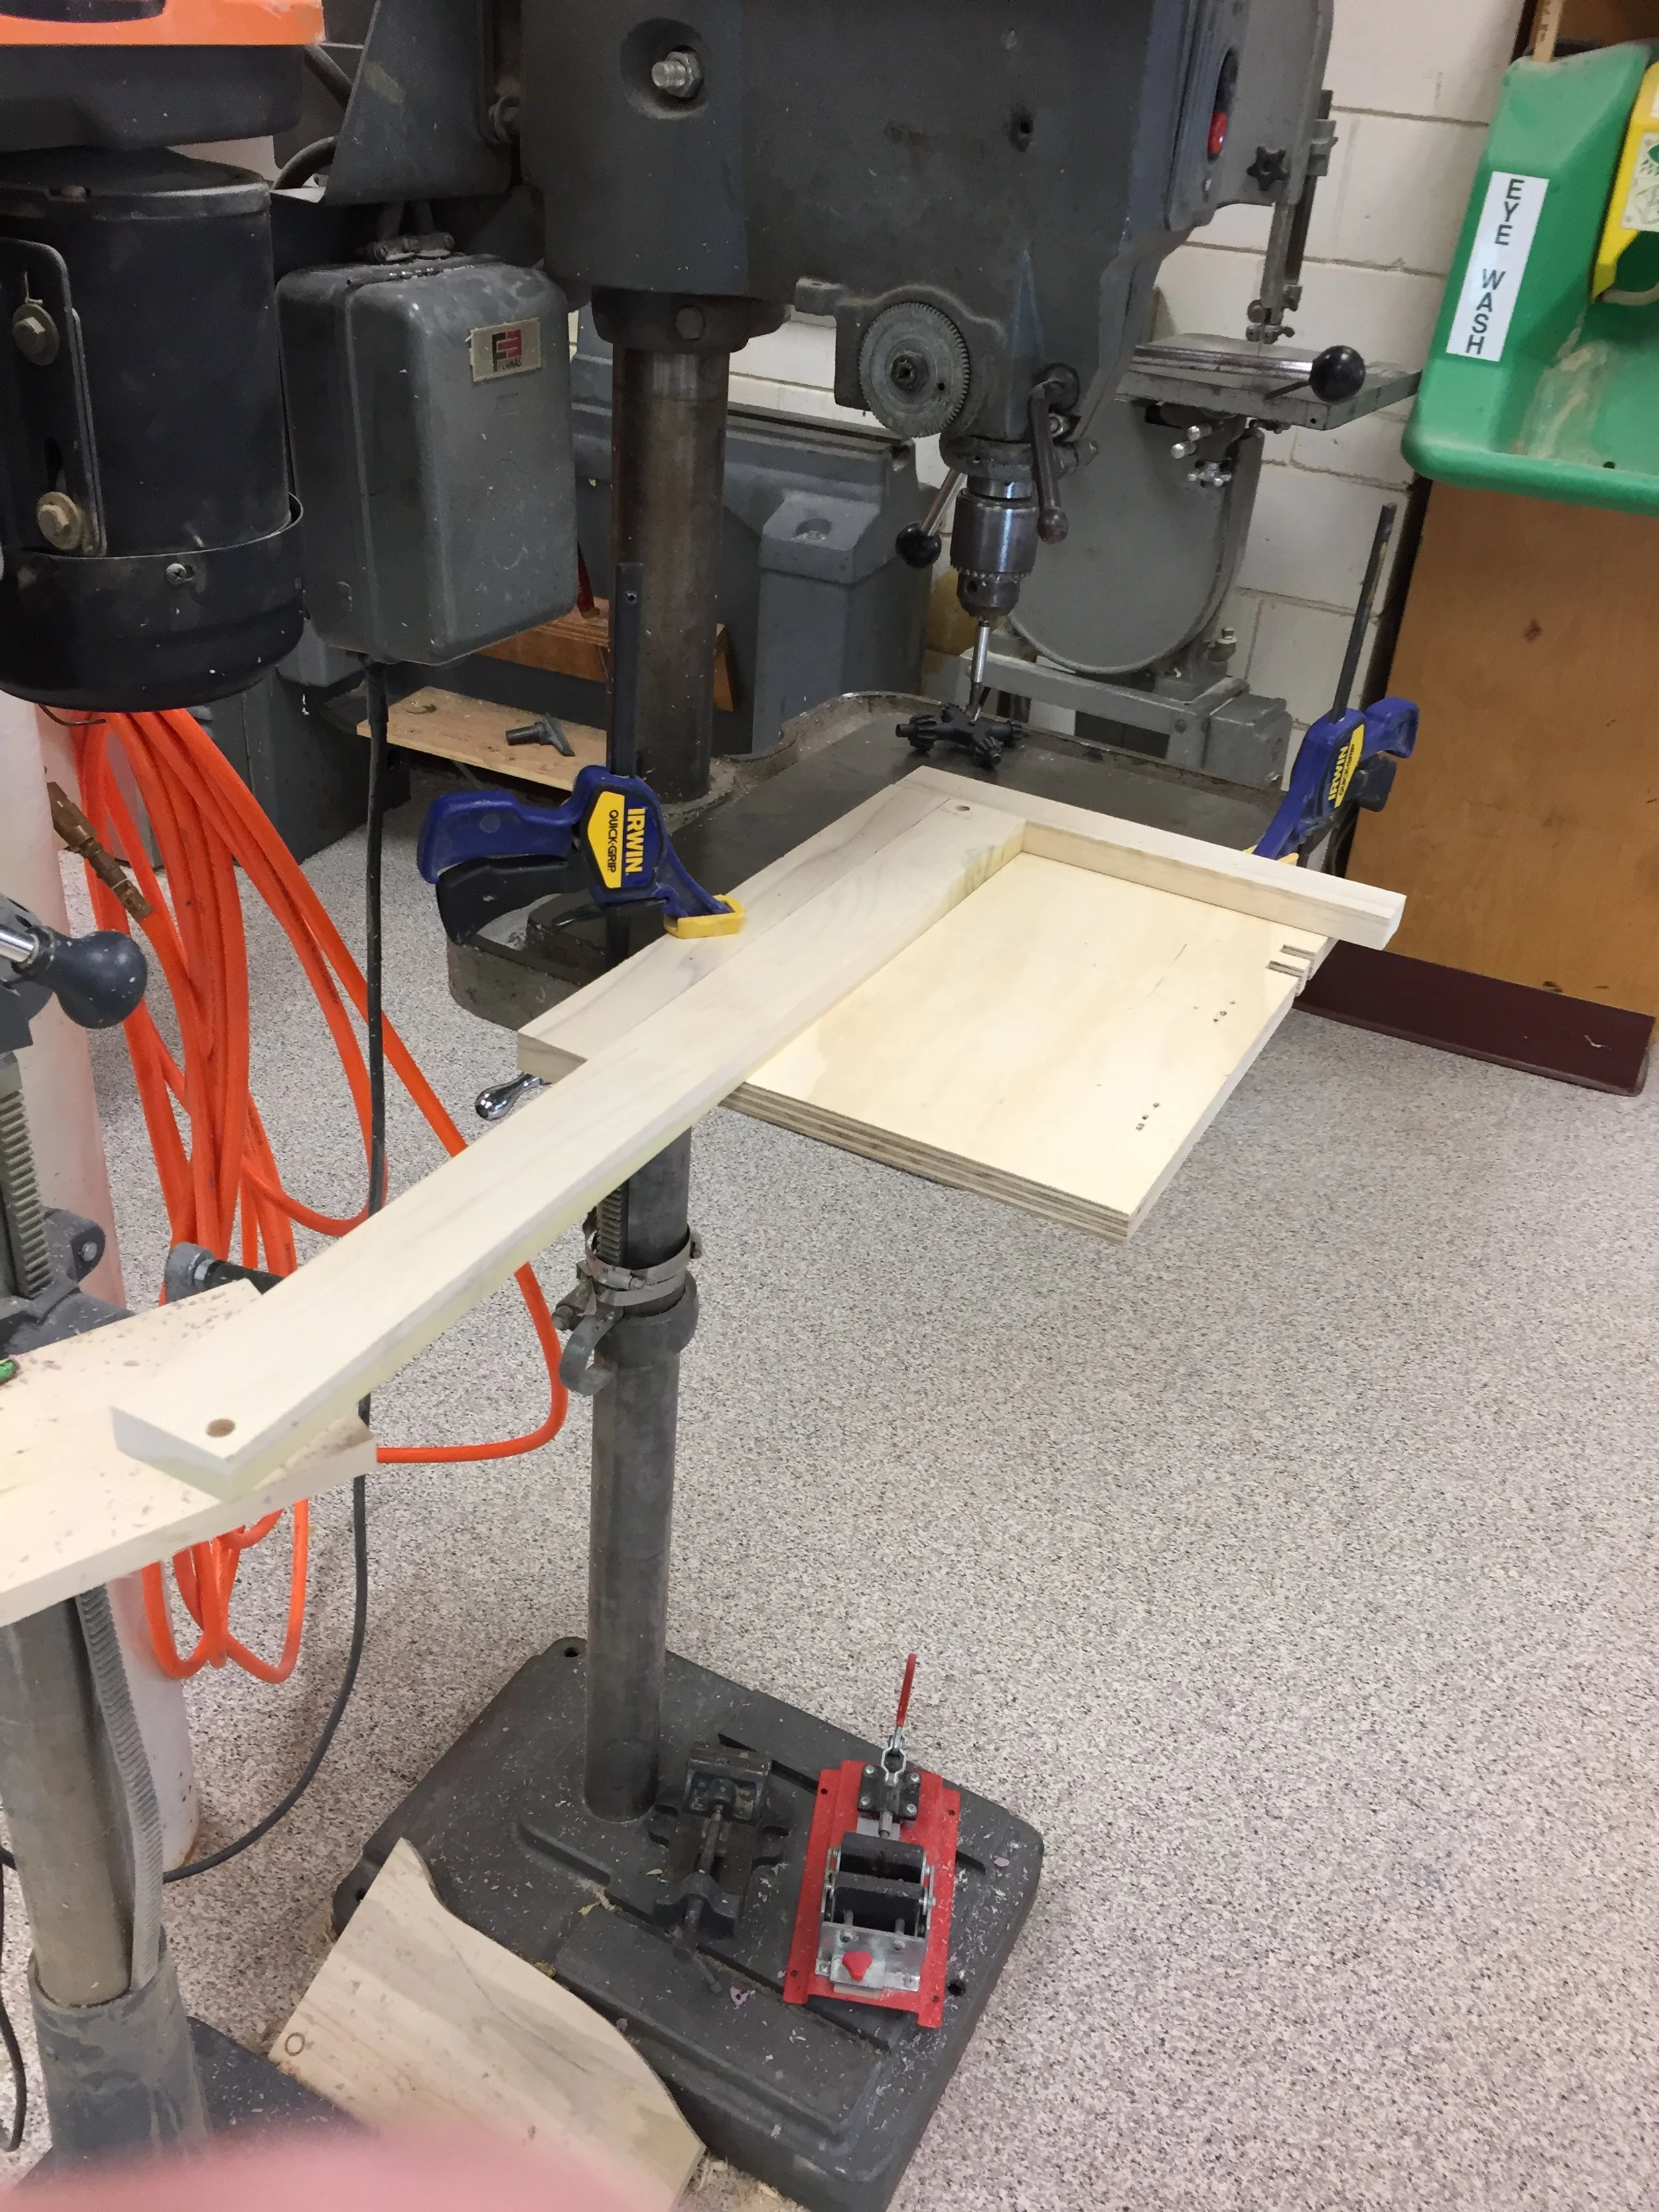
The Cross Pieces
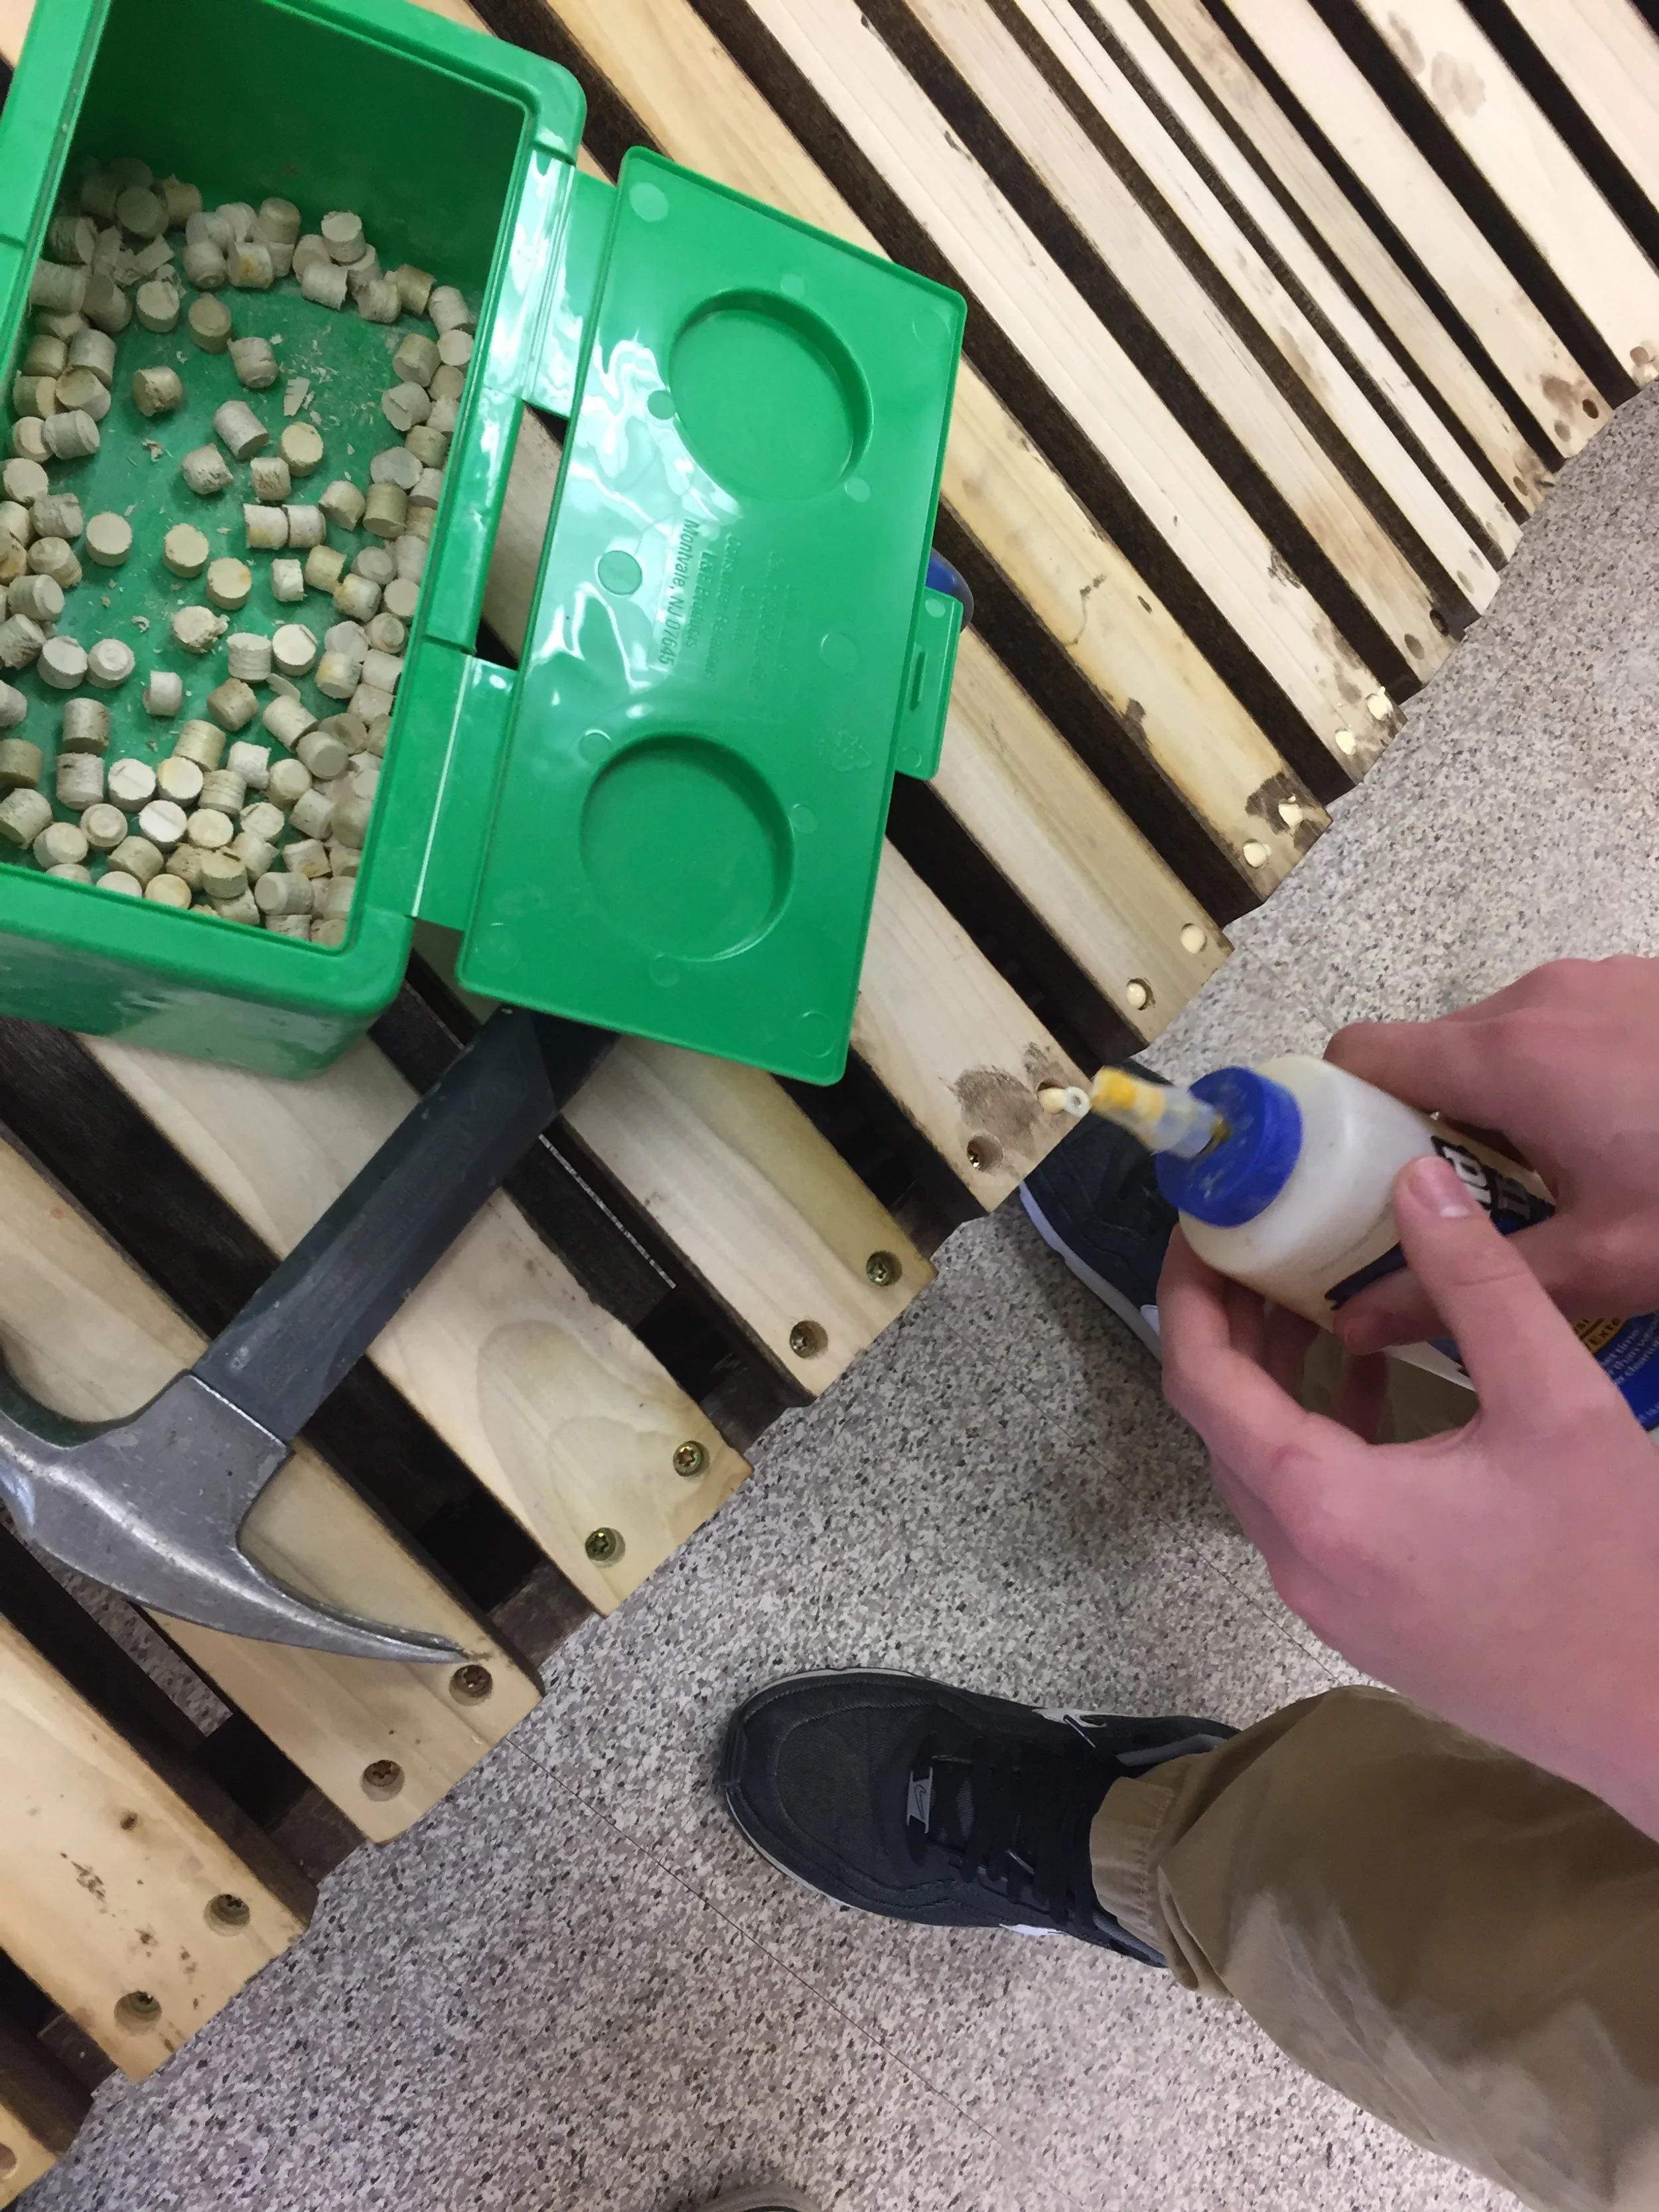
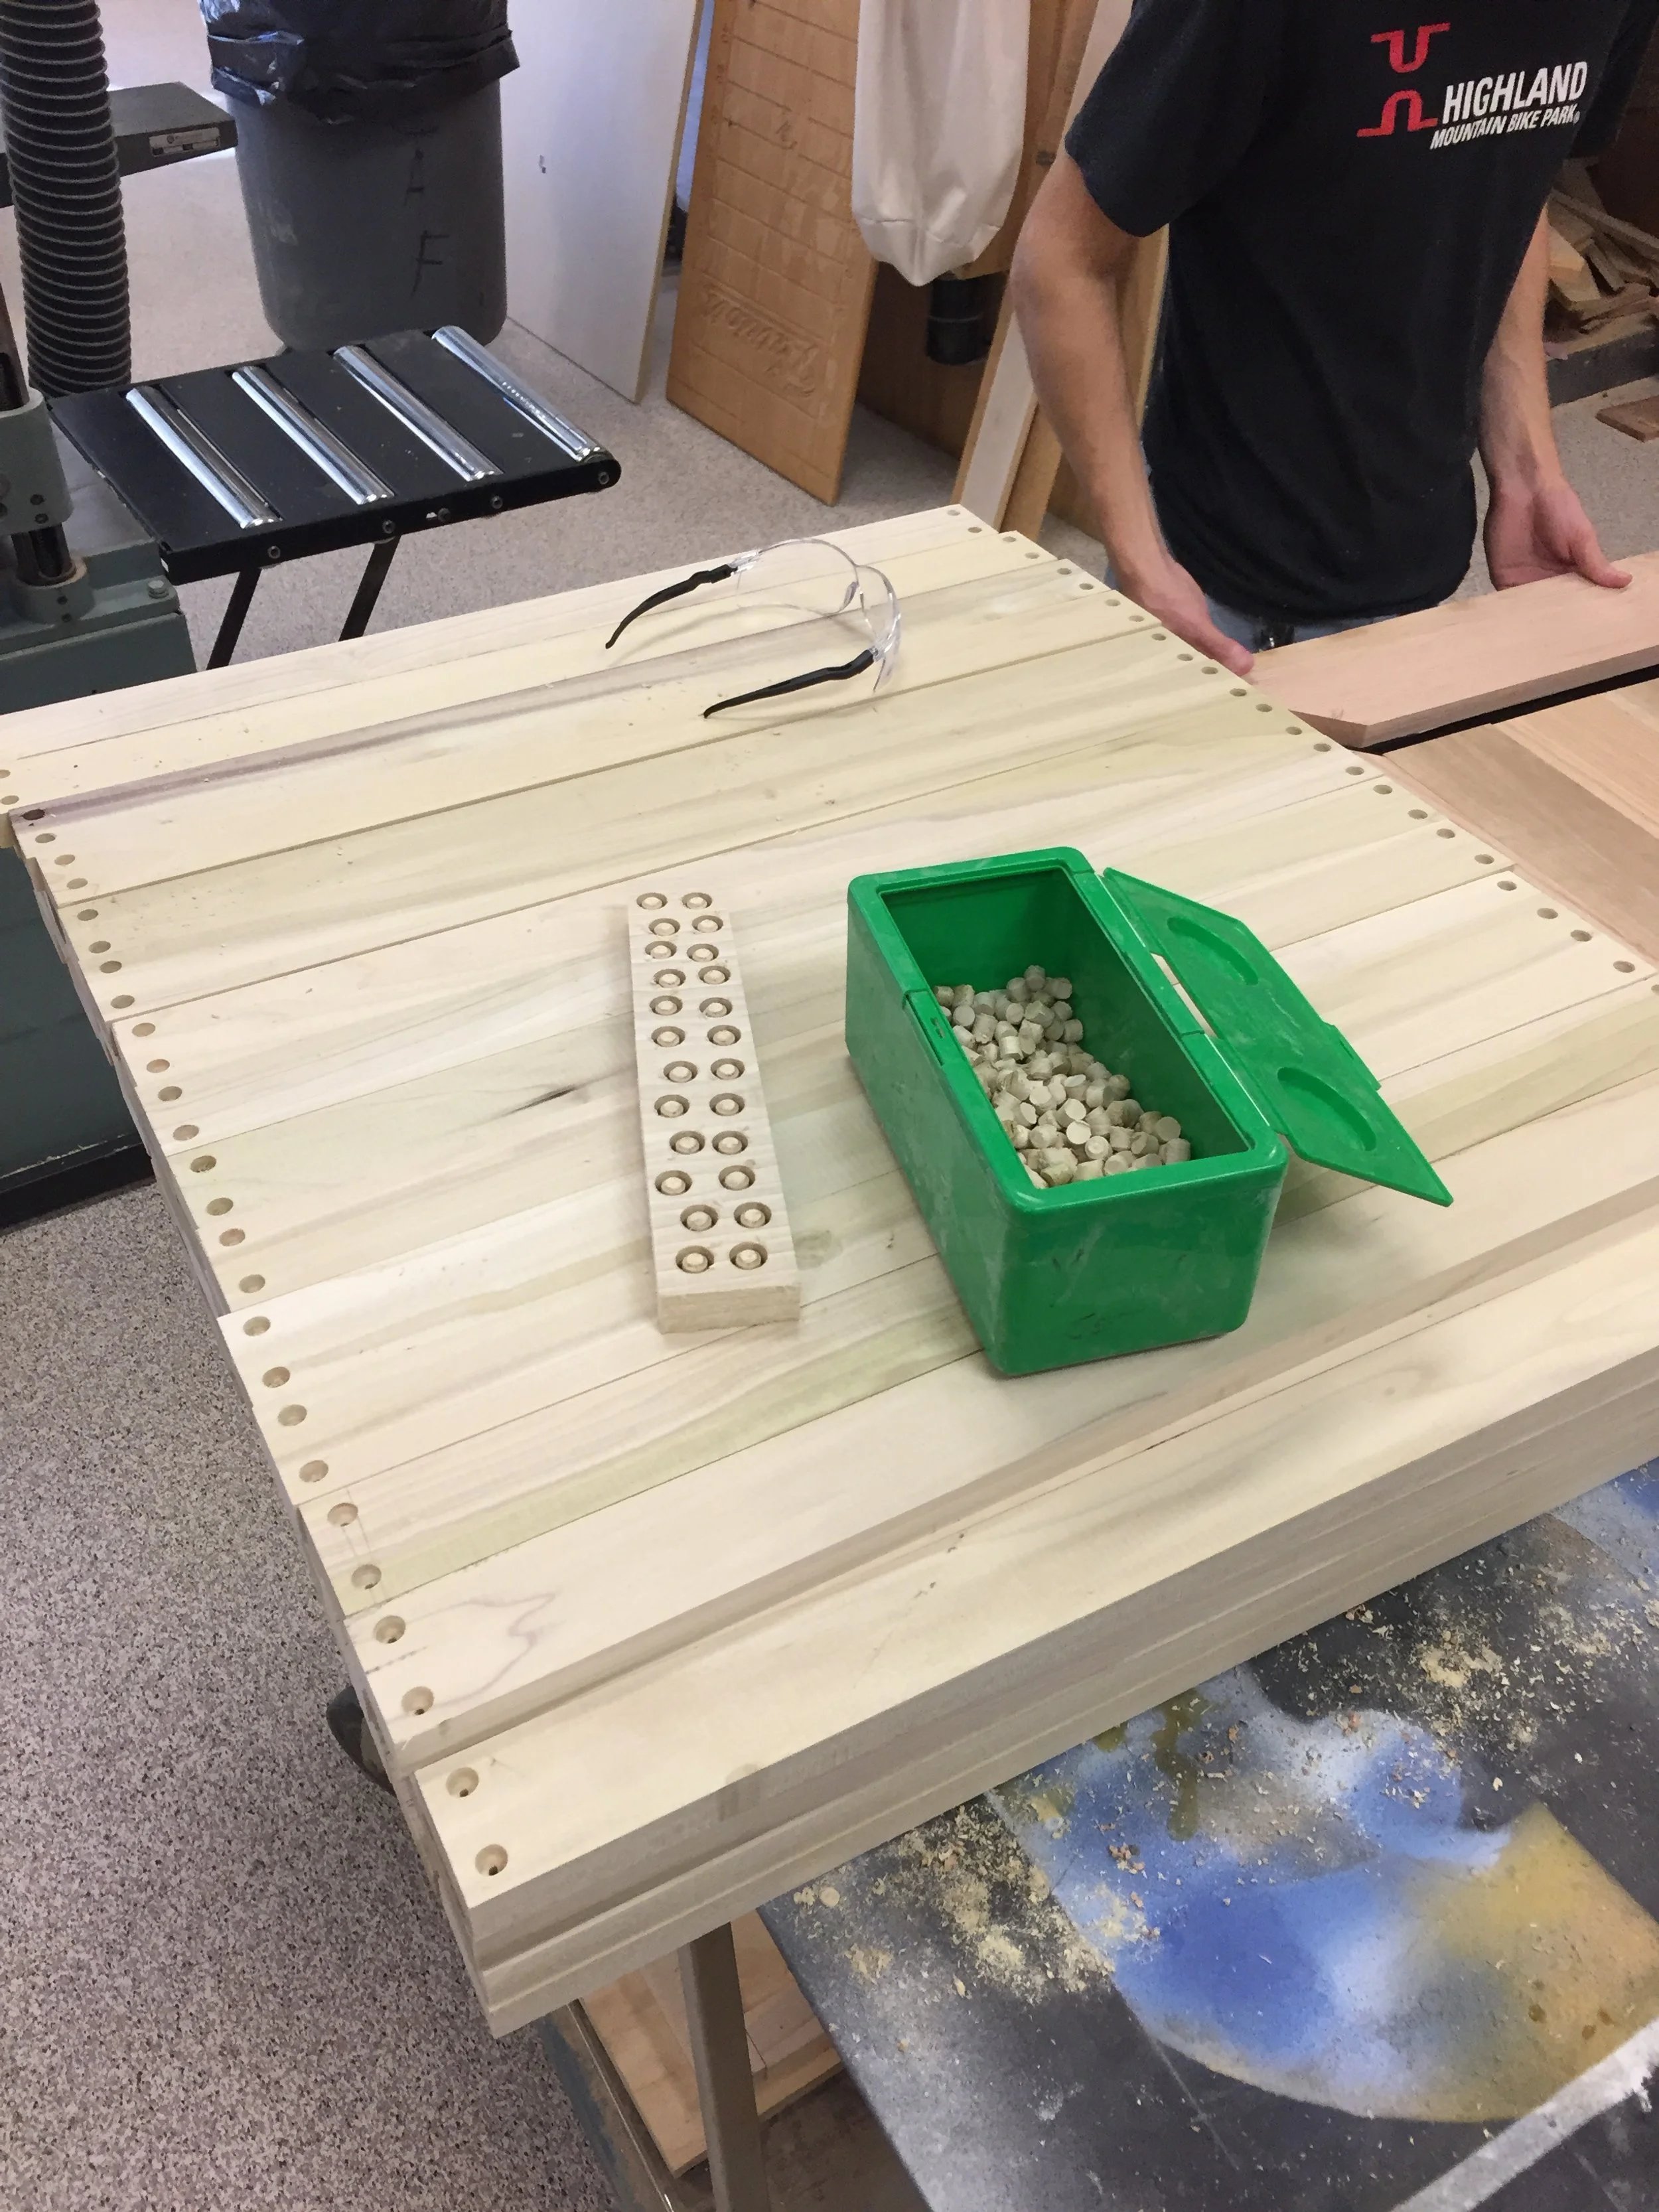
The next step of the process of making this chair was creating the cross pieces that would connect the two sides. We created these strips all equal by using a table saw on pieces of wood with equal length (pictures on the top right image). The next step was to drill holes in the ends of all the cross pieces to enable clean attachment to the two sides. To do this easily and evenly we created a corner jig on the drill press so that all we had to do was slide each piece into the jig and the drill would put the hole in the exact same place on each one (pictured in the bottom left image). The final step was to cut out a bunch of plugs to fill the holes we drilled after the attaching the pieces for aesthetic purposes.

The Final Steps
Finishing up this chair began with us staining and clear coating all of the cross pieces on every side that would not need any sanding in the future. After that, we began attaching them to the two sides and filling in the holes with our plugs (seen in the image on the right). After everything was attached, we sanded off the tops of all the cross pieces and stained the clear coated the rest of the chair.